Actividad B: Creando mi mapa digital
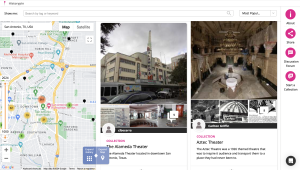
This is a screenshot of some storymaps created around San Antonio, Texas using the digital tool of History Pin.
In this activity we will be using History Pin, an open source tool that connects communities with local history. It is a place for people to share photos and stories, telling the histories of their local communities.
Create you digital map!
The instructor will guide you to have access, explore and engage with History Pin. The instructor can consider inviting a representative in your library of the digital humanities hub, organization, center, institute to facilitate a workshop using this digital tool. At UTSA you may want to contact the Community-Engaged Digital Scholarship (CEDISH) Hub.
Congratulations on completing part 1 where you sketched your map and brainstormed ideas for part 2. Now you will make sure to have 1-10 images digitally in a folder. and a location, address or specific place of each image.
STEPS
Ver : Ejemplo 1, Ejemplo 2
- Create an account (preferably use non-social media related login options)
- Start a Collection by clicking “Explore Historypin” then clicking on “Start a Collection”
- Provide Title to your project
- Start by adding a pin and include the following information
*you may want to write this in Spanish, English, Spanglish and other languages that are connected to your story. Remember to use the different verbs you have learned in this course in present, past and future tense.*
-
- A photo
- title
- description
- copyrights
- year(s)
- location/exact address
- keywords
- PRESS SAVE!
- Continue adding more pins with their respective information.
- Now lets pins from other stories.
- To search for others’ collections, start by clicking on “Collections” on the top menu
- Using the search bar, type possible keywords that relate to your own project (locations, events, people, etc.)
- Once you’ve chosen a collection, explore it for possible images that relate or connect to your project.
- Once you select the image pin, click “Repin”
- Once you have your collection complete with your own pin and with other collections pins, you may want to try creating a tour of your collection. Please follow this tutorial: https://www.youtube.com/watch?v=rlF6ehpEAZk
*if you need help following these steps you can always to these tutorials: https://about.historypin.org/how-to-guides/
SHOWCASING YOU DIGITAL MAP (FIRST DRAFT)
- Now in groups you will share you experiences creating your digital map and discuss futures additions to it.
- Finally, students will showcase their maps with the whole class and interact with some of the pins included.